When you're upgrading to a new version of Windows 10, such as the May 2020 Update, the setup backs up the previous installation automatically as a safeguard, in the event that the upgrade fails, and the system has to revert the changes to original state, or the new version isn't working as expected, and you need to roll back to an older release.
Although this approach can make sure that you always have a way to undo the changes, the previous installation files stored inside the "Windows.old" folder can take up a lot of space, even after the upgrade completes successfully.
If, after installing a new release of Windows 10, you're suddenly running of space, deleting these files can reclaim anywhere from 8GB to 12GB of storage. The amount of storage may not seem like much when we have drives with multiple terabytes, but on devices with limited space could be a significant gain.
In this Windows 10 guide, we'll walk you through the steps to remove the previous installation files consuming valuable space after upgrading to the May 2020 Update.
- How to free up space after May 2020 Update using Storage sense
- How to free up space after May 2020 Update using Temporary files
- How to free up space after May 2020 Update using Disk Cleanup
Important: After removing the previous installation files, the option to rollback will no longer be available in the Settings app. In the future, if you want to downgrade, you'll need to perform a clean installation using the version of Windows 10 that you want to use.
How to free up space after May 2020 Update using Storage sense
If you performed an in-place upgrade to the May 2020 Update, you could use Storage sense to remove the previous installation files.
To reclaim space after installing the May 2020 Update, use these steps:
- Open Settings.
- Click on System.
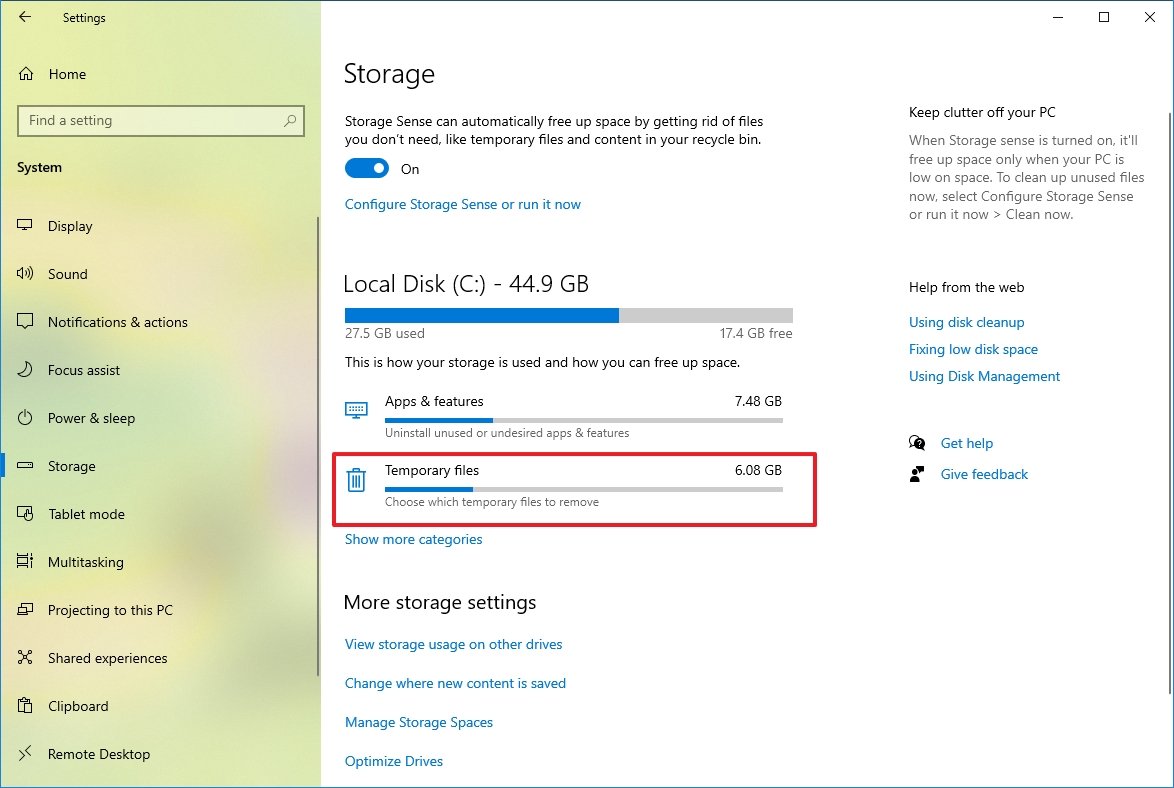
- Click on Storage.
- Under the "Storage" section, click the Configure Storage Sense or run it now option.

- Under the "Free up space now" section, check the Delete previous version of Windows option.
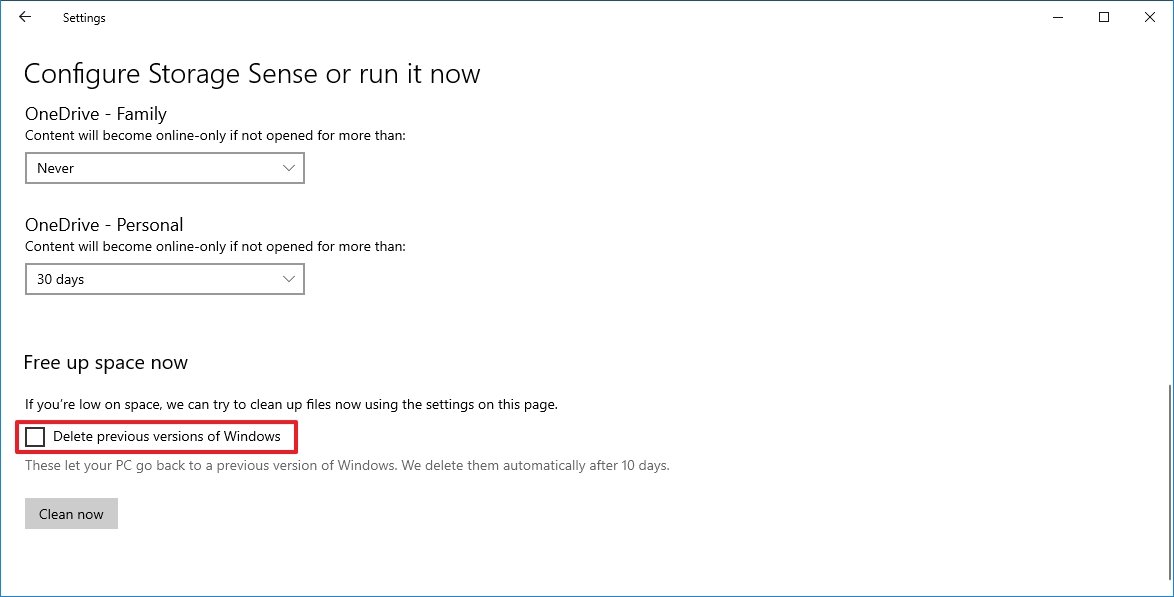
- Click the Clean now button.
Once you complete the steps, Windows 10 will remove the "Windows.old" folder that stores your previous installation reclaiming several gigabytes of storage for more important files.
How to free up space after May 2020 Update using Temporary files
Alternatively, you can also use the Temporary files settings to delete the previous Windows 10 installation files.
To delete the previous setup to free up space, use these steps:
- Open Settings.
- Click on System.
- Click on Storage.
- Under the "Local Disk (C:)" section, click the Temporary files option.
- Check the Previous Windows installation(s) option.Quick tip: You can also select other temporary files (such as Delivery Optimization Files and Windows update log files) to recover even more space.
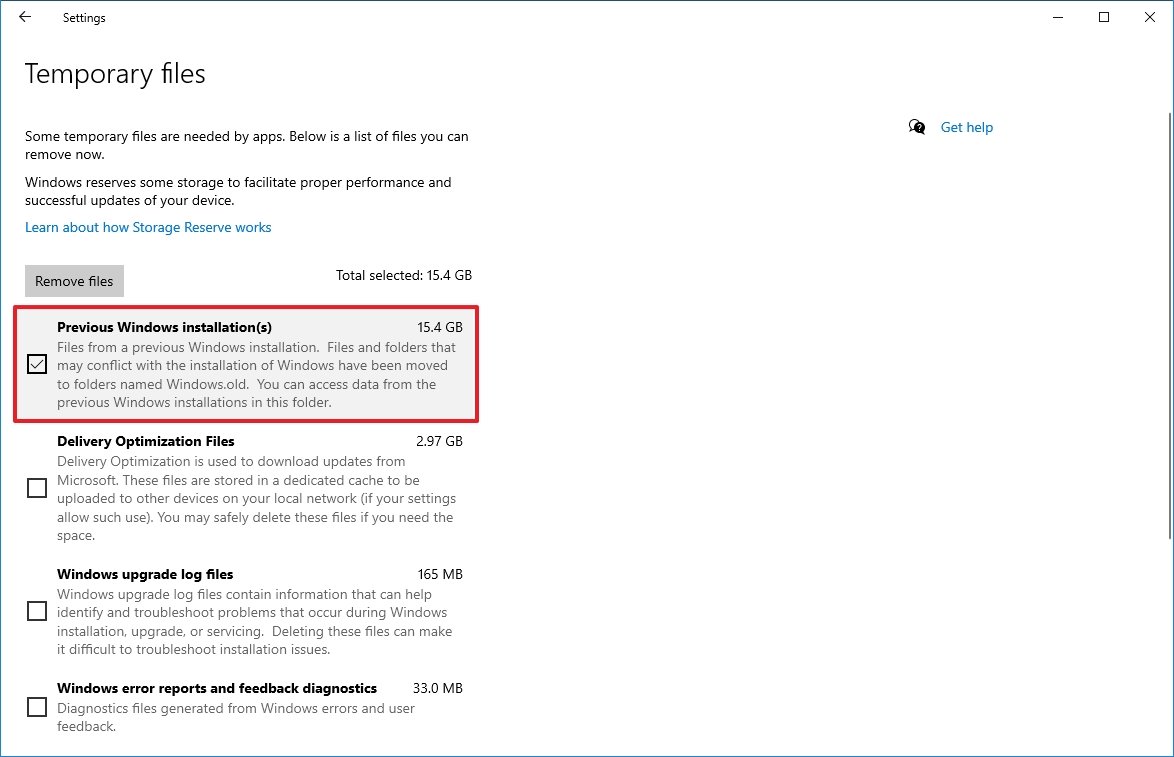
- Click the Remove files button.
After you complete the steps, the previous installation files will be deleted along with any other temporary files that you may have selected to remove using these settings.
How to free up space after May 2020 Update using Disk Cleanup
In addition to using the Settings app, you can also use the legacy Disk Cleanup tool to delete the folder with the previous installation of Windows 10.
To free up space after the installation of version 2004 with Disk Cleanup, use these steps:
- Open Start.
- Search for Disk Cleanup, click the top result to open the experience.
- Click the Clean up system files button.
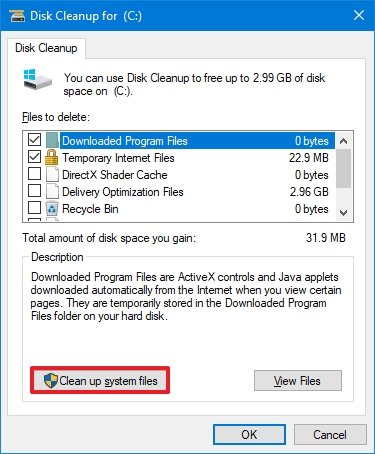
- Check the Previous Windows installation(s) option.Quick tip: You can also select other temporary files (such as Delivery Optimization Files and Windows update log files) to recover even more space.
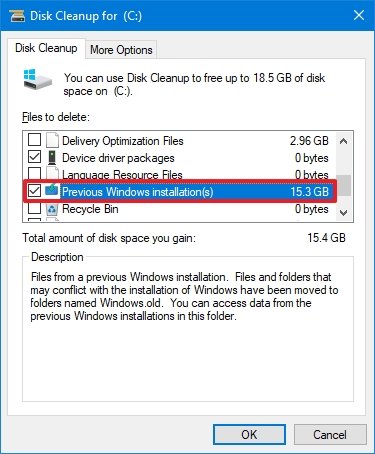
- Clear the Downloads option to avoid deleting downloaded files inside the "Downloads" folder.
- Click the OK button.
Once you complete the steps, the folder with previous installation files will be deleted from your computer, freeing up storage on the main drive.